Python Dev Log.1
VSCode SetUp
Extensions list
PythonPylanceRuffPython Debuggerpython-snippets(extension_id:cstrap.python-snippets)
- Formatter & Linter
后文提到的 Ruff 不仅可以在命令行中使用,还可以集成到 VS Code 中,以便在保存文件时自动格式化和检查代码。或者也可以用微软维护的 Black Formatter 的插件
VS Code 配置示例: 在 .vscode/settings.json 中添加以下配置,使得代码在保存时自动格式化和修复
1
2
3
4
5
6
7
8
9
10
"editor.formatOnPaste": true,
"editor.formatOnSave": true,
"editor.formatOnType": true,
"[python]": {
  "editor.codeActionsOnSave": {
    "source.fixAll.ruff": "always", // fix all
    "source.organizeImports.ruff": "always", // sort imports
  },
  "editor.defaultFormatter": "charliermarsh.ruff"
},- LSP
推荐 Pylance 作为 LSP,个人开发过程中的配置 👇
1
2
3
4
5
6
7
8
9
10
11
12
13
14
15
16
17
18
19
20
21
22
23
24
25
  "python.languageServer": "Pylance",
  "python.analysis.cacheLSPData": true,
  "python.analysis.typeEvaluation.enableReachabilityAnalysis": true,
  // inlay hints releated
  "editor.inlayHints.enabled": "offUnlessPressed",
  "python.analysis.inlayHints.callArgumentNames": "all",
  "python.analysis.inlayHints.functionReturnTypes": true,
  "python.analysis.inlayHints.pytestParameters": true,
  "python.analysis.inlayHints.variableTypes": true,
  "python.analysis.typeEvaluation.deprecateTypingAliases": true,
  "python.analysis.autoFormatStrings": true,
  "python.analysis.autoImportCompletions": true,
  "python.analysis.completeFunctionParens": true,
   // 类型检查设置为 strict,大型项目中,推荐使用,保证软件Robustness
  "python.analysis.typeCheckingMode": "strict",
  // 启用同步服务器,暂时不稳定(2024年10月),默认是关闭的,不推荐使用
  "python.analysis.enableSyncServer": false,
  "python.analysis.typeEvaluation.enableExperimentalFeatures": true,
  "python.terminal.activateEnvInCurrentTerminal": true,
  "python.terminal.shellIntegration.enabled": true,
  "python.analysis.fixAll": [
    "source.unusedImports",
    "source.convertImportFormat"
  ],
  "python.analysis.nodeExecutable": "/usr/sbin/node",
Package & Project Management
python 管理环境的工具有点过多了 😵💫
conda create --name <venv_name>python -m venv <venv_name>poetry- …
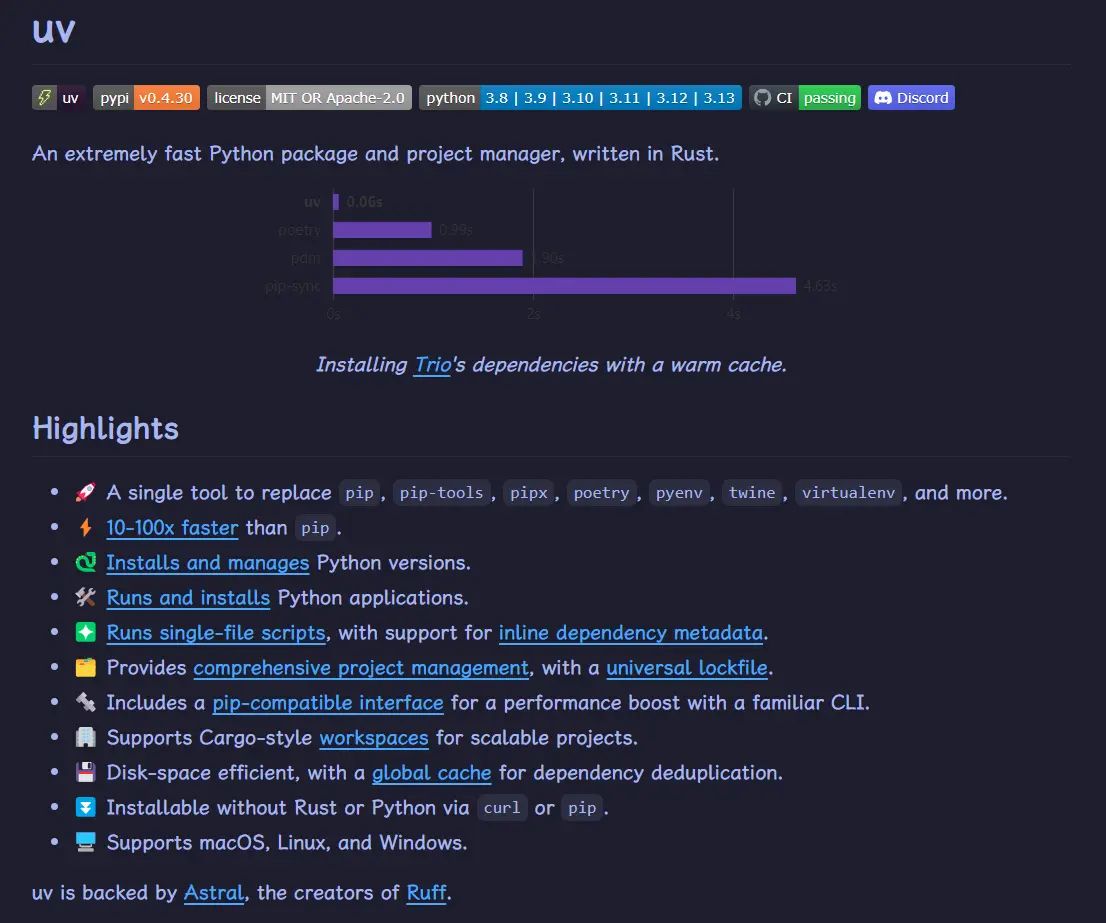
这里选择了UV An extremely fast Python package and project manager, written in Rust.
使用过程中就感觉到快 😎👍

Installation
1
2
3
4
5
6
7
8
# On macOS and Linux.
$ curl -LsSf https://astral.sh/uv/install.sh | sh

# On Windows.
$ powershell -ExecutionPolicy ByPass -c "irm https://astral.sh/uv/install.ps1 | iex"

# With pip.
$ pip install uv
使用方法可以参见 uv 官方文档
下面是个人比较常用的命令
Virtual Environment
1
2
3
4
5
6
7
8
9
10
11
12
13
14
15
16
17
18
19
20
21
22
23
24
25
26
# 创建虚拟环境
$ uv venv myenv
Using CPython 3.12.7 interpreter at: /usr/sbin/python
Creating virtual environment at: myenv
# 激活虚拟环境
$ overlay use myenv/bin/activate.nu
# 退出虚拟环境
$ deactivate


# 切换项目使用的 Python 版本
$ uv python pin 3.12
Updated `.python-version` from `3.13` → `3.12`
$ uv sync
Using CPython 3.12.7 interpreter at: /usr/sbin/python
Removed virtual environment at: .venv
Creating virtual environment at: .venv
Resolved 44 packages in 1ms
Audited in 0.00ms
# 列出可用的Python版本,包括已下载和可供下载的
$ uv python list
# 下载指定版本的python
$ uv python install 3.12
Searching for Python versions matching: Python 3.13
Installed Python 3.13.0 in 7.77s
 + cpython-3.13.0-linux-x86_64-gnu
Dependency
uv 也实现了部分 pip 的功能,使用 uv pip install -r requirements.txt 或 uv pip install -r pyproject.toml --extra dev
导出依赖
将 pyproject.toml 文件导出为 requirements.txt 格式:uv pip compile ./pyproject.toml -o ./requirements.txt
1
2
3
4
5
6
7
# 添加依赖
uv add ruff
uv pip install ruff
# 更新依赖
uv add ruff==0.7.2
# 卸载依赖
uv remove ruff
Formatter&Linter —— Ruff
Ruff An extremely fast Python linter and code formatter, written in Rust.
- Linter: A Linter is a tool that analyzes your code and reports on potential issues.
- Formatter: A Formatter is a tool that automatically formats your code.
ruff 可以在 pyproject.toml 中配置,也可以在 .ruff.toml 中配置
具体参数可以参考 Ruff Configuration
此外,在 Git 中可以设置 Pre-push hook,在每次代码推送前自动运行 Ruff 检查。以下是一个示例脚本,将其保存为 ./.git/hooks/pre-push。下面代码比较暴力,直接检查当前目录下 Python File 的格式是否正确,可以自己改一下,只检查已 commit 的代码
1
2
3
4
5
6
7
8
9
10
cat ./.git/hooks/pre-push
#!/bin/sh
# 运行 ruff 检查
uv run ruff check .
# 检查 ruff 的退出状态
if [ $? -ne 0 ]; then
    echo "Ruff check failed. Please fix the issues before push."
    exit 1
fi
echo "All checks passed."
MISC
__pycache__
在 Python 开发中,项目会生成一些临时文件和缓存文件,比如 __pycache__ 目录。不需要时,可以用下面的命令可以递归删除这些缓存文件夹
python3 -Bc "import pathlib; [p.rmdir() for p in pathlib.Path('.').rglob('__pycache__')]"python3 -Bc "import pathlib; [p.rmdir() for p in pathlib.Path('.').rglob('.pytest_cache')]"find . -type d -name __pycache__ -exec rm -r {} \+find ./ -type f -name '*.pyc' -delete -print && find ./ -type d -name "pycache" -delete -print
StackOverFlow: Python3 project remove __pycache__ folders and .pyc files
json
1
2
3
4
5
6
7
8
9
10
11
12
13
14
import json

res = json.dumps(
	{
		"networks": {"lan1": "192.168.1.0/24", "lan2": "192.168.2.0/24"},
		"connections": {
			"conn1": "Connection(src=192.168.1.1/24, dst=192.168.1.2/24, src_port=80, dst_port=8080, transport_proto=TCP)",
			"conn2": "Connection(src=192.168.1.1/24, dst=192.168.2.1/24, src_port=99, dst_port=8080, transport_proto=TCP)",
		},
	}
)

print(res)
print(json.dumps(res)) # 对已经转换过的json再次转换,将对特殊字符进行转义
1
2
3
$ python ./temp.py
{"networks": {"lan1": "192.168.1.0/24", "lan2": "192.168.2.0/24"}, "connections": {"conn1": "Connection(src=192.168.1.1/24, dst=192.168.1.2/24, src_port=80, dst_port=8080, transport_proto=TCP)", "conn2": "Connection(src=192.168.1.1/24, dst=192.168.2.1/24, src_port=99, dst_port=8080, transport_proto=TCP)"}}
"{\"networks\": {\"lan1\": \"192.168.1.0/24\", \"lan2\": \"192.168.2.0/24\"}, \"connections\": {\"conn1\": \"Connection(src=192.168.1.1/24, dst=192.168.1.2/24, src_port=80, dst_port=8080, transport_proto=TCP)\", \"conn2\": \"Connection(src=192.168.1.1/24, dst=192.168.2.1/24, src_port=99, dst_port=8080, transport_proto=TCP)\"}}"pyproject.toml
为了规范化 Python 项目的构建系统,Python 社区提出了 PEP 518,提案提出使用pyproject.toml方法指定 Python 项目的构建系统及其依赖关系,避免多个不同工具之间的配置文件不一致问题。详见Writing your pyproject.toml
- The
[build-system]table is strongly recommended. It allows you to declare which build backend you use and which other dependencies are needed to build your project. - The
[project]table is the format that most build backends use to specify your project’s basic metadata, such as the dependencies, your name, etc. - The
[tool]table has tool-specific subtables, e.g.,[tool.hatch],[tool.black],[tool.mypy]. We only touch upon this table here because its contents are defined by each tool. Consult the particular tool’s documentation to know what it can contain.
[build-system]暂不涉及,其主要负责 python 打包和发布相关的配置[project] 主要负责项目元数据,如项目名称、版本、依赖等[tool] 可以集中配置各种工具,如 ruff、black、pytest等,统一在pyproject.toml里,保持根目录的整洁
1
2
3
4
5
6
7
8
9
10
11
12
13
14
15
16
17
18
19
20
21
22
23
24
25
26
27
28
29
30
31
32
33
34
35
36
37
38
39
40
41
42
[project]
name = "vnet"
version = "0.1.0"
description = "virtual network"
readme = "README.md"
requires-python = ">=3.10"
dependencies = []

[project.optional-dependencies]
doc = ["mkdocs-material", "mkdocs-mermaid2-plugin"]
dev = ["pytest>=8.3.3", "ruff==0.7.2", "pytest-cov"]

[tool.ruff]
line-length = 100
target-version = "py312"
respect-gitignore = true
indent-width = 4

[tool.ruff.format]
quote-style = "double"
indent-style = "tab"
docstring-code-format = true

[tool.ruff.lint]
ignore = ["E402"]

[tool.pytest.ini_options]
# 设置syspath目录
pythonpath = "/home/efterklang/workspace/vnet"
# 添加命令行选项
addopts = "-vs"
# 指定测试路径
testpaths = ["./test"]
# 指定测试文件和命名规则
python_files = ["test_*.py"]
python_classes = "Test*"
python_functions = "test_*"

# 命令行日志输出设置
log_cli = true
log_cli_format = "%(asctime)s [%(levelname)s] %(message)s"
log_cli_date_format = "%m.%d %H:%M:%S"
@dataclass
在 Python 中,定义一个类常常需要编写重复的代码,如构造函数(__init__)、比较函数(__eq__)、字符串表示(__repr__)等。为了解决这一问题,Python 3.7 引入了 @dataclass 装饰器,帮助开发者自动生成这些函数。@dataclass 的出现简化了类的定义,尤其是那些主要用于存储数据的类,减少样板代码(boilerplate),使得代码更加简洁和易读。
Java 中与之类似的是
record,JDK14 引入的。public record Person(String name, int age) {}
Lombok提供了@Data注解,也可以自动生成 getter、setter、toString 等方法
官方文档 👉dataclasses — Data Classes
frozen=True,可以让类的实例变为不可变对象,类似于namedtuple。
1
2
3
4
5
6
7
@dataclass(frozen=True)
class Point:
    x: int
    y: int

p = Point(10, 20)
# p.x = 30 # 这会抛出错误,因为 Point 是不可变的- 通过
field()函数,可以为类中的字段设置元数据,如是否初始化、默认工厂等。
1
2
3
4
5
6
7
8
9
from dataclasses import dataclass, field

@dataclass
class User:
    username: str
    password: str = field(repr=False)  # 在 __repr__ 中隐藏该字段

user = User(username="alice", password="secret")
print(user) # 输出:User(username='alice')asdict和astuple:可以将数据类转换为字典或元组。有时候需要将数据类转换为其他格式,比如 JSON;序列化时可以使用asdict减少编码工作,此外也可以选择Pydantic,Marshmallow等库
Python Dev Log.1
